Blog Home

Maker creates his own coilgun using an Arduino Nano

Arduino TeamAugust 15th, 2017

If you suppose that electromagnetically-propelled projectiles are strictly the purview of well-funded government research labs, think again! Using two sets of coils wrapped around custom 3D-printed base structures and an Arduino Nano for control, YouTuber “Gyro” created his own coilgun capable of propelling steel fast enough to dent a piece of wood.

When fired, a photodiode at the end of each electromagnet coil sends a signal to the Arduino. This, in turn, shuts off the coil, allowing it freely escape the barrel.

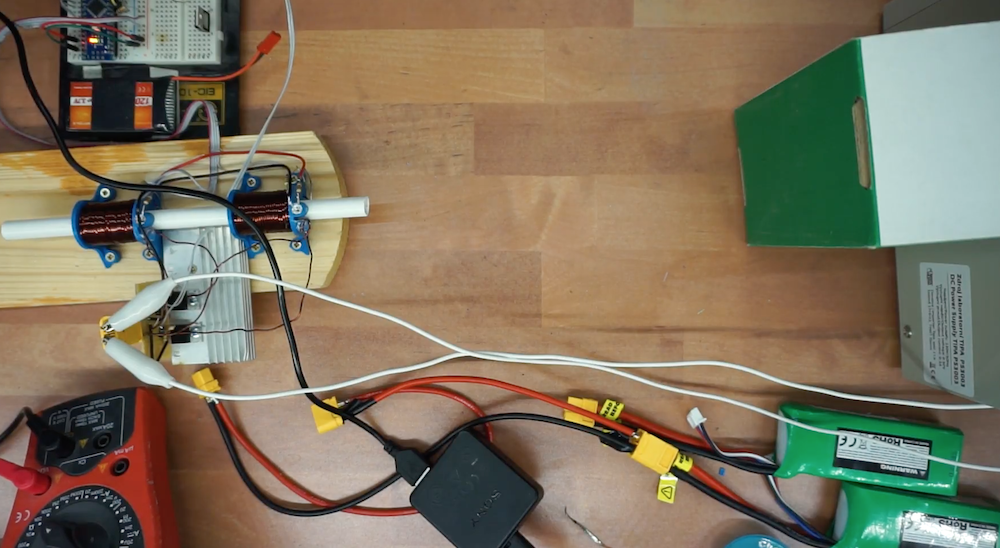
As noted in his Instructables write-up, the gun is constructed without large capacitors, which can be expensive and dangerous. Instead, two LiPo battery packs are combined to produce around 22 volts, though this and the number of coils used, could be increased to produce a more powerful device!

Boards:Nano
Categories:ArduinoFeatured

5 Responses to “Maker creates his own coilgun using an Arduino Nano”

  1. tarekomari Says:

    good job

  2. leoncoolmoon Says:

    nice job! 1.have you try steel ball ? 2. why not use 3.3v on arduino instead of 2.5v?

  3. stefcop Says:

    Great job on the project , it’s awesome , though a little comment on the article , massive capacitors are used for more power and even if you stack up 10 stages of coils and control circuitry here chances are you are not going to get the same level of power as you’d get with dumping a large HV capacitor bank in a big thicc coil

  4. RealSaturdayScience Says:

    Options for MOSFET – use an optoisolator as the LED drive can be connected to Arduino. Use a different MOSFET with low gate threshold.

  5. RobotPower Says:

    20V is the >absolute maximum< for the gate voltage. 12V is fine to turn those MOSFETs on.

    Also, how about showing the coil magnetic field equation to see why people use capacitors

Leave a Reply

You must be logged in with your Arduino account to post a comment.