Use light painting to visualize magnetic fields
Light painting is a photography trick that exploits a camera’s shutter. To ensure proper exposure in different lighting conditions, cameras have variable shutter speeds. If the subject is well-lit, then the shutter may only remain open for ten or so milliseconds. But if the subject is very dark, then a photographer may choose to leave the shutter open for minutes. Anything bright that moves in the frame will leave “painted” streaks. This project takes advantage of light painting to visualize magnetic fields.
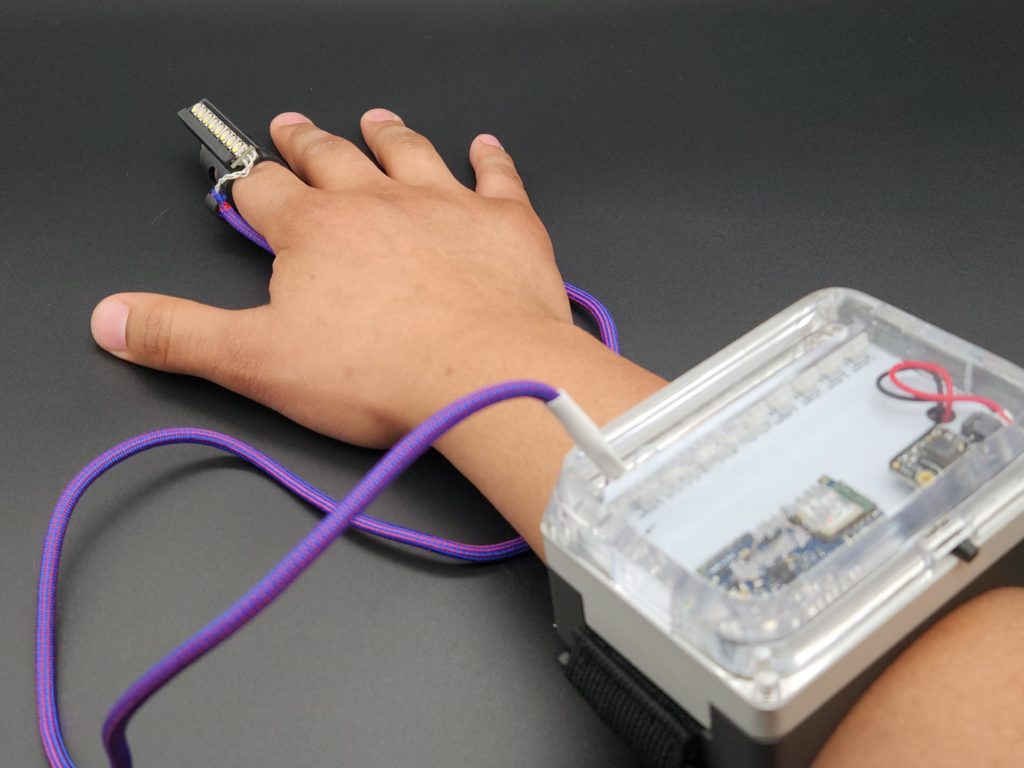
Because exposure (both for film cameras and digital cameras) relies on brightness, anything dark that moves in a long exposure photo will be barely visible. But anything bright (LEDs, in this case) will be very visible. For this project, Chris Hill wears an LED array on their fingertip. When they capture a long exposure photo, their hand is dark and almost invisible. But the LEDs, which illuminate in response to the presence of magnetic fields, are bright and show up clearly in the picture. The result is a light painting of magnetic fields that would otherwise be invisible to the human eye.
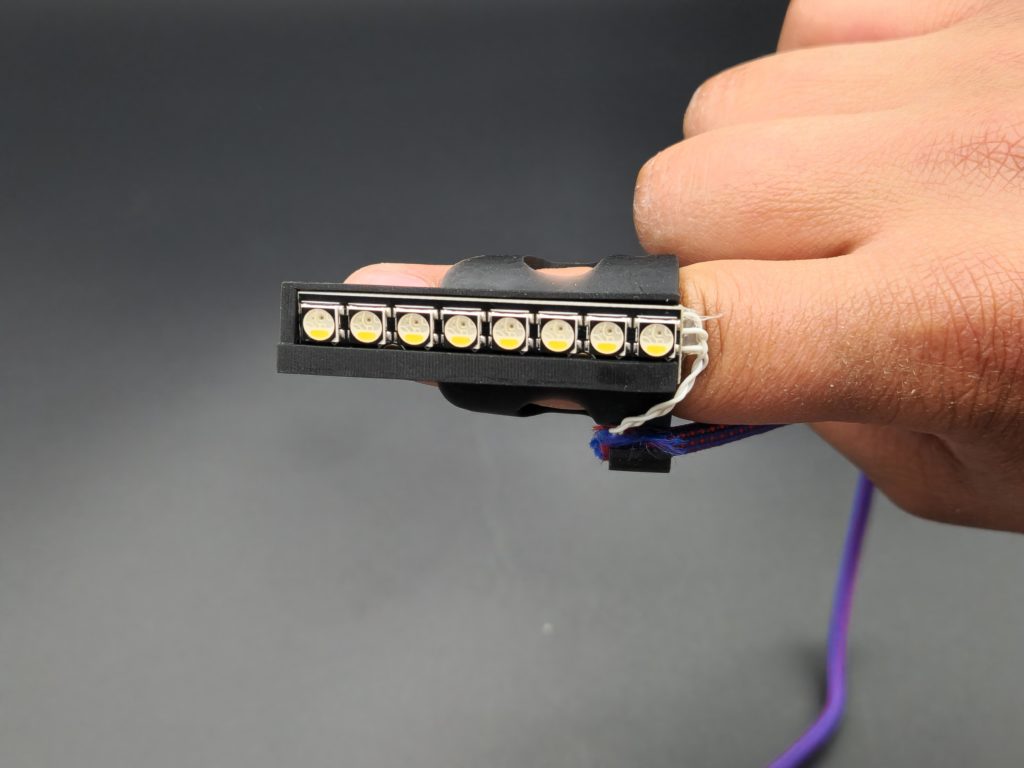
The LEDs (an Adafruit NeoPixel Stick) and ultrahigh sensitivity analog sensor (to detect the strength of magnetic fields) are worn on the finger, but the rest of the electronic components reside in a 3D-printed enclosure that straps to the forearm. That enclosure contains an Arduino Nano 33 BLE board, an Adafruit MiniBoost 5V power module, and a 2500mAh LiPo battery. The Arduino monitors the strength of the magnetic fields detected by the sensor and then activates a proportional number of LEDs on the NeoPixel Stick. In the light-painted photo, this presents as a series of overlaid bar graphs that depict the magnetic field strength in their positions.