A step-by-step tutorial for Intel Galileo: getting started with Mac OS X
Today we start the first of a series of monthly blogposts dedicated to Intel Galileo. Stefano Guglielmetti, who’s already blogged about the Arduino Yún some time ago, shared with us his tutorial about how to get started with the Arduino Certified board.
—————————————-
IMPORTANT: Connect your Intel Galileo to the 5V power supply before any other connection or you will damage the board.
During the Maker Faire Rome, I was lucky to get an Intel Galileo. But when I had to use it, it was suddenly clear that it’s not as straightforward as Arduino. I had to resort to desperate measures and do something that really only a very restricted class of noble people do, I had to read the manual.
The getting started guide by Intel really helped, but the problem is that it’s clearly written by engineers, while the Galileo board wants to attract makers, designers, artists and many people that are used to the “tutorial” or “step by step” approach and are not really into manual reading.
I used to be an RTFM fanatic, but I’m getting old, and I have learned to appreciate when people help me, so I’m very happy to contribute and give some help to those in need.
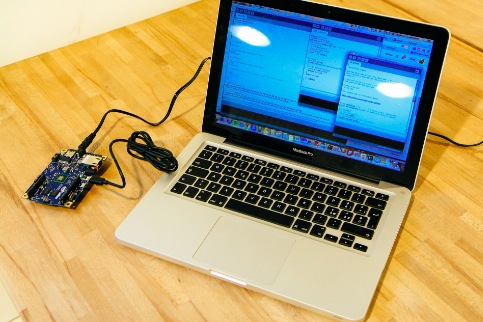
So. You have an Intel Galileo board, a Mac (I assume you have Mac OS X Mavericks installed), and you want to run the very first basic example: the “Blink” sketch from the Arduino examples. Right?

This is what you have to do, straight and easy.
So, let’s start:
- Download the Galileo software from the Intel website. If you already have the Arduino IDE, don’t overwrite it. Even if the Intel software is based on the Arduino IDE, it is not 100% identical, and it will only manage the Galileo board, so if you want to use them both, simply unzip the Intel software, rename it into “Galileo”, and move it into your Application folder. Don’t rename it into something with spaces, and do not put it into folders with a space in their name, because it won’t work.
- Plug the 5V adapter, wait 10 seconds and then connect the USB client (the little usb port next to the ethernet plug) to your Mac’s USB port
- You have to wait a minute: it takes a little while for the USB stack to start on the Galileo board, then you can start the Galileo IDE
- Go to Tools > Port menu and select the /dev/cuXXX serial port. If you don’t see the port, close the IDE, wait a minute, and open it again.
- Now, you have to update the Galileo’s firmware, so, go on Help > Firmware Upgrade. If everything is ok, you should see a message asking for confirmation if the 5V power cable is plugged in. Since you have followed these instructions, it should be, so click yes, do the same on the next dialog and the process should begin. It will take 5-6 minutes. During the process, avoid touching the cables or the board or the IDE. Just sit down and relax.
- When the process is complete, the “Target Firmware upgraded successfully” message is displayed. Click OK to close the message.
- Now choose the blink example from File > Examples > 01.Basics > Blink
Upload the blink sketch and you’re done! It’s time to celebrate! :)
P.S. The Quark processor can become very hot, don’t worry it’s normal.