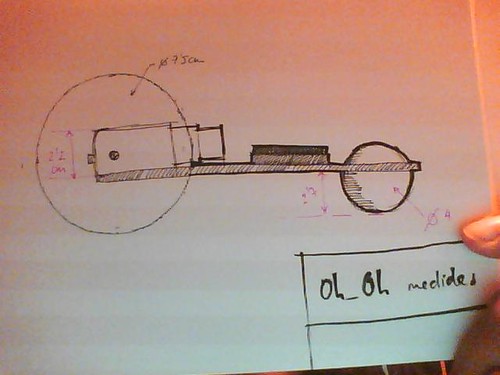
Oh_Oh robot, low cost, easy to replicate robot for kids

I am amazed by the work David Cuartielles in collaboration with Xun Yang, Tlacotalpan, Alejandro Jimenez, Hugo and our common friend Gianluca Martino, the Hardware responsible for Arduino. The point is making a robot easy to build / repair / reproduce, low cost. Easy to be programmed by kids. As you can read, David is often involved in kid-related workshop in Mexico, and here and there in Europe. It seems that he’s achieved a good point in developing a strong yet cheap platform who is changing very quickly. Stay tuned & follow the visual diary of the prototypes at this gallery and some videos at this channel
Oh_Oh is the result of an exploration in the possibilities of cheap educational electronics. It is very important to keep the importance of low cost as a fundamental part of the project, since that will influence its design, as well as its accessibility.
We created Oh_Oh after a couple of basic workshops in electronics with Kids at FARO de Oriente in Mexico DF. Very early in the process we realized there was an interest in learning about robotics. The Computer Clubhouse counts with a couple of Lego kits, but not enough for a group of 20 kids.
We realized that Mexico has a couple of companies dedicated to designing, manufacturing and selling small robots. However they were not really complying with the idea of reprogramability and reusability of general electronics, due to a closed firmware and the lack of an IDE to easily reconfigure the robot’s behavior.
The important aspect for us was that we could get access to all the parts needed to build a cheap robot on-site. And that we could then easily hook up this robot to Arduino and build from there. So we decided to go on with the idea of making our own robot with as little parts as possible.
more info after the break
Third experiment: Oh_Oh goes Graffiti from David Cuartielles on Vimeo.
You can have a brief history of first Arduino experiments with robots on the project page: from the Ars Electronica workshop of Dave Mellis based on Asuro (created by the Institute or Robotics and Mechatronics at the German Aerospace Agency (DLR) and distributed by Arexxx Engineering) to the Imori Kits. Everything is very well described. Good work
Here some hardware spec:
Taking all of the above mentioned aspects into account, the hardware design should include:
- an ATmega processor, the design should allow using the mega8 pinout to control the motors, which means being careful where to place the PXM enabled pins
- an H-bridge L293D, to control both speed and direction on the two DC motors that would drive the robot
- two DC motors with gear boxes, and wheels that could be found in Mexico
- a ping pong ball as the back wheel
- there will be no sensors on board, they will be placed on a daughter board situated in front of the robot that we decided to call nose in the same wayArduino has got shields
- there should be the possibility to mount a shield for Arduino on top of the robot
- the possibility to be programmed from Arduino’s IDE (this affects the Software)
- a button and some LEDs on board
- a connection with the third PWM to allow easy connecting a servo
- powered by 9V batteries
When it comes to software, there are three aspects to take into account:
- how will the users program the robot, this is part of the user experience
- which IDE is convenient for our scenario of use, how will the IDE interact with the software needed to command the robot
- which are the possibilities to expand the system
- what experiments are interesting for a newcomer in the ages from 10 to 18 years old with no prior experience in electronics or software, what can be engaging and informative at the same time
via [Oh_Oh]