Build your own handheld retro console with the Arduino® UNO™ Q board
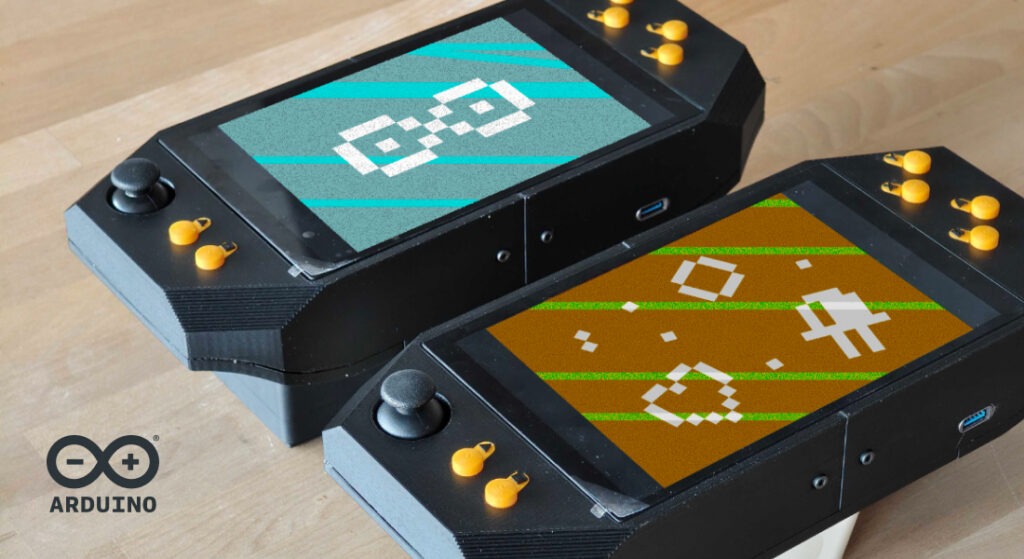
Arduino® Project Hub has featured a lot of DIY handheld consoles on this blog over the years. Most of them are impressive, and most of them require at least some custom hardware – a purpose-designed PCB, a specialized connector, a part you can only get from one supplier. They’re great projects, but they can feel just out of reach for makers who don’t have a deep electronics background.
Zalmotek’s retro game console is different, because it’s based on UNO Q. Every single component can be bought from a standard online retailer and connected together. It even uses mostly premade cables and wires – which means zero soldering. The only custom parts are a 3D-printed enclosure and buttons, held together with heat-set inserts for a clean, professional feel. It’s as impressive as it is accessible, and that’s our favorite combination.
What’s on the BOM
The hardware list is relatively short. An UNO Q 4GB board does the heavy lifting. An Arduino® UNO™ Media Carrier provides the physical connections – DSI for the display, 3.5mm audio for the speaker – without requiring any custom wiring between components. Three Arduino® Modulino™ Buttons handle the face buttons. A Modulino Joystick handles navigation. Just add a display, UPS module, a small speaker, and a USB-C PD adapter to round out the build.
Whether it comes from inside or outside the Arduino ecosystem, everything connects and works seamlessly because the UNO Media Carrier handles the bridging. No breadboard, no custom firmware, no fighting with drivers.
Where the dual-brain of UNO Q really shines
Here’s where things get technically interesting – and where the UNO Q stands out as more than just an SBC substitute.
The STM32 microcontroller on the board monitors all the control inputs from the Modulino nodes. It then passes those inputs to the Linux side, where a Python daemon translates them into standard USB gamepad commands. That clean handoff means RetroArch – the open-source multi-system emulator that powers the gaming experience in Zalmotek’s project – receives perfectly standard controller input, with no unusual configuration and no custom emulator patches.
The Linux side runs RetroArch natively, outputting to the DSI display over the Media Carrier and audio through the 3.5mm jack. Game ROMs live on the onboard eMMC storage. The full experience – multiple emulation cores, controller input, display output, audio – runs on a single board without a separate compute module or any additional hardware.
This is the dual-brain architecture at its most elegant: the MCU handles what it’s best at (low-latency hardware I/O), the MPU handles what it’s best at (running complex Linux applications), and the bridge between them makes the whole thing feel seamless to build and to use.
No NPCs allowed
The finished console is, as Zalmotek acknowledges, a little chunky – that’s the honest trade-off when you build from modules rather than a custom PCB. The beauty, however, is anyone can build it!
Zalmotek has published everything you need on the Arduino Project Hub: full hardware list, assembly walkthrough, software setup guide, and the complete source code on GitHub. The tutorial is thorough and beginner-friendly, and the Arduino® App Lab environment makes the software side of the setup smooth as well.
You can replicate their project without a hiccup, but don’t stop there. Swap the display for a different size. Redesign the enclosure. Add a Modulino™ Movement node for motion controls. Build your own game in Godot and run it on the hardware you made. And, of course, pay it forward by sharing on Project Hub what you come up with!
P.S. If the handheld form factor isn’t what you’re after, it’s also worth checking out the UNO Q Arcade Bundle we launched recently – for a similar approach configured for a desktop arcade cabinet with a custom controller.