Great Scott! Learn how to drive flux capacitor-style LEDs
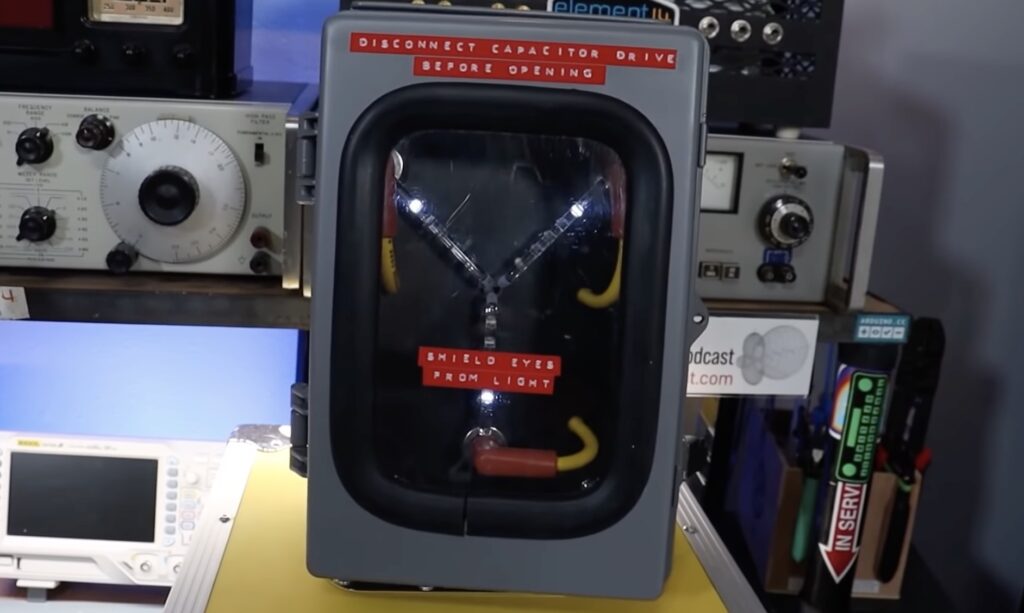
The flux capacitor is one of the most iconic movie props of all time. Part of that is due to its plot purpose in the Back to the Future franchise, but its fame is also because it looked so futuristic when the first movie hit theaters in 1985. LEDs were still relatively new in the public consciousness at the time and the animated LED effects in the prop flux capacitor were attention getting. If you want to reproduce that effect, element14 Presents’ Derek Brodeur has a video showing you have to drive flux capacitor-style LEDs with an Arduino.
The experienced among you know that this effect is possible to achieve with discrete components, which is likely how the original prop worked. But it is easier to reproduce the “animation” using a modern microcontroller like the Microchip ATmega4809 found on the Nano Every board. By driving each LED via PWM (pulse-width modulation), you can control its brightness. PWM works by very quickly modulating power to LED, with proportion of “on” time resulting in perceived brightness.

In order to produce the trailing effect seen on the flux capacitor, Brodeur explains how to write a sketch with a loop that fades the LEDs in, keeps them at max brightness, and then fades them out again in sequence. Unlike with discrete components, the Arduino makes it easy to control the timing of each step in the animation. The rest of the tutorial focuses on constructing the flux capacitor using common supplies so that it looks close to the original prop. It isn’t an exact replica, but it is close enough that everyone will immediately recognize it for what it is.