DIY Toner Transfer Circuit Etching

Well. As most of you I begin my day hanging around in different forums. One of them (one of the firsts) is the Arduino Forum, with his new layout.
In these day a thread took my attention: P18F4550 made his first Arduino Shield. When questioned to make a step by step guide of the all process he posted wonderful pics of the all thing.
[from P18F4550 on the Arduino Forum]
|
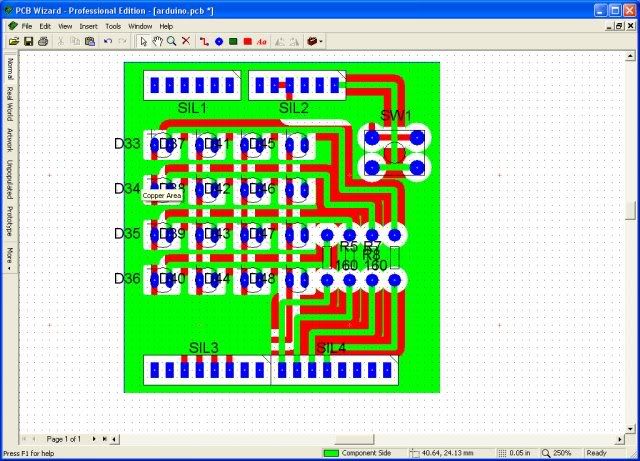
Design the circuit, i use PCB Wizard

After printing the design to the photo paper carefully cut out the transfers, i print them on a laser printer with settings of paper type = transparency and density = 9 (highest)  Cut the copper board to about the right size leaving a bit extra to account for burring of the edges  Clean off the burred edges with a file and then i clean the board with Cif cream and a pan scourer, this is the important bit so take time to be sure the board is clean, when you rinse the cream off if the water runs straight off the board then it’s not clean, if the water remains then it’s clean  Dry the board and put it between a folded piece of paper and pre-heat the board, this ensures that any remaining water is evaporated  Next i use acetone (AKA Nail Polish Remover) to clean and remove and residue of Cif cream and grease  Drill two 0.6mm holes in the paper transfer, anywhere but be sure to drill the same two hole in both top and botom transfers  Lay the transfer on the board and with 0.6mm drill mark the board by drilling through the holes in the transfer, this is also a critical stage, be sure that the holes in the board are as vertical as posible or the pads won’t line up on the bottom side,then using a couple of pieces of 0.6mm solid core wire to line up the transfer with the alignment holes in the board.  With the hot clothes iron tack down the top transfer then turn the board over an line up the bottom transfer the same as the top by using the two pieces of wire and tack this side down with thiron too  Slip the board between the peice of paper and apply heavy preasure with the iron set to hottest setting and no steam, hold the iron there for greater than 30 seconds, take the board out, carefull it’s hot, turn the board over and apply the same preasure to that side, the metal plate is not nessisary but i use it as a heat sink, not to disperse the heat but to hold the heat and hopefully keep both sides of the board at an even temperature  Use the tip of the iron and work your way over the whole surface of the board until the traces under the paper start to show through, be very thorough here and make sure to iron every part of the transfer, turn the board over and do the same on that side  All traces show through, i think it’s ready  Drop the board into some warm water, leave for 5 minutes for the paper to soak  Gently rub the paper with your thumb and the paper will seperate, the white substance left behind is the glossy coating of the paper, this will also rub off   When all traces of material have washed off it’s ready for etching, notice there are a couple of bad spots in the toner, this might be because i rushed these pictures and didn’t clean the board enough, or wasn’t thorough enough with the ironing process, either way they can be touched up with fine tipped permenent marker pen  I hope this post will be of some use, this time i took more time over the alignment and the pads lined up perfect, so i guess time and patience is the answer. |
follow the chat going on at the [Arduino Forum]