Maker builds an Arduino-controlled, chess-playing robot
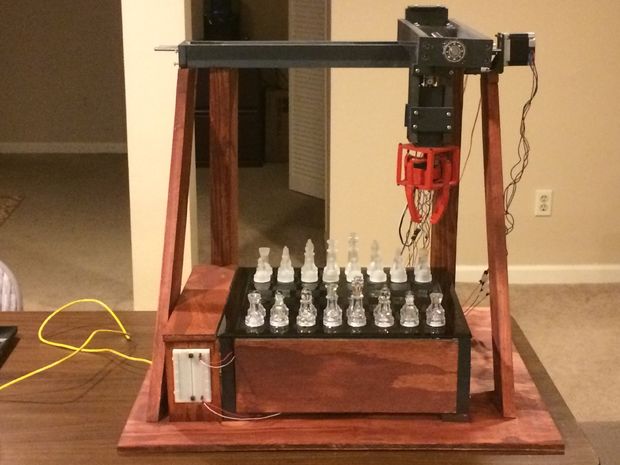
While playing board games on a computer screen can be entertaining, this experience lacks a certain tangible aspect. YouTuber RoboAvatar decided to take things into the third dimension with a chess machine that uses an XYZ gantry system and gripper to move pieces as needed.
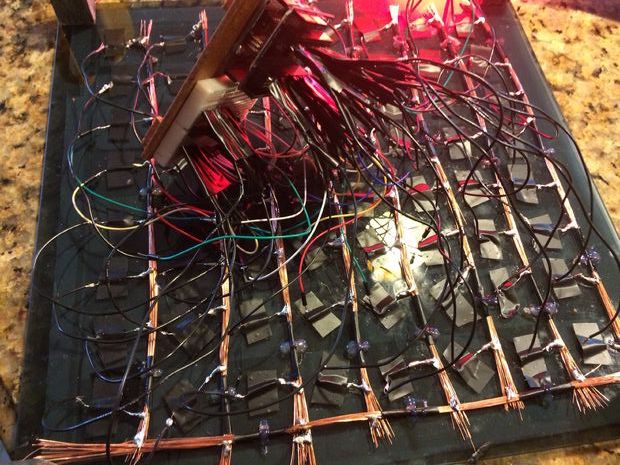
Instead of a vision system, RoboAvatar’s robotic device uses 64 reed switches (one for each square) to tell an Arduino Uno where the magnetized pieces reside. The project also features a Mux Shield and a pair of MCP23017 I/O expander chips, providing a total of 93 available pins.
While the Uno controls the physical motion and sensing of the board, a computer runs a Python program that does the chess game calculations and sends this information to it. You can see the machine demonstrated in the first video below. The second gives an overview of how it was made.
Want to build your own chess-playing robot? More details can be found over on Instructables.
September 29th, 2017 at 23:28:27
As part of my college senior projects, I created a checker playing robot about 40 years ago. I had a few guys doing the imaging portion and they found an answer that really makes the imaging portion a piece of cake.
Take a picture, save it
Take a picture, compare it to previous. If deltas are really large, take another picture
If deltas are just right, then review the deltas.
Or more simply put, take a picture before and a picture after. The differences will be a piece that has moved.
No special image processing and recognition, just some basic math. It doesn’t even depend on special alignment.
If you look at the difference between the before and after picture, it’s really easy to see the difference.
A little math correlates the areas to which square it is on. You really don’t even have to know which was the before and after, as all you have to do is compare it to the in-memory layout of the pieces. If you see a difference in A2 and C1, then the rook probably moved.
Why was I comparing the number of differences to begin with? That the routine seeing that your hand is over the board.
It may have taken less time than putting all those reed switches together. If you had mounted a camera and Arduino on one end of the gantry, then you would have been able to use a standard chess set and board.
Yes, it did surprise me with the simplicity that these guys came up with. In those days it was a CPM console computer. It barely fit in a van.