Wireless Robotics Platform: Cheap R/C Vehicle + Arduino + XBee + Processing
— March 5th, 2010
Wow. I definetly have to check this step by step guide to build your own Processing-controlled car.
Toy Hacking is one of the best way to learn how to deal with little hardware. Very well detailed.
++
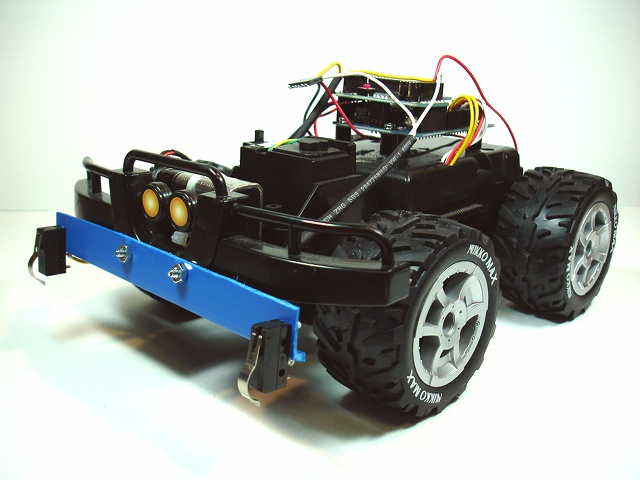
Some Features:
via [NootropicDesign]
Tag Technorati: arduino, Rc Cars, Xbee, Processing,All logic controlling the vehicle is performed in a Processing program running on remote computer. The Arduino program listens for commands from the remote computer. Bi-directional wireless communication over XBee radios with (theoretical) 1-mile range. I’ve accomplished 1/4 mile range with these radios. Sensor events are transmitted from the vehicle to the controlling computer. This vehicle has 3 microswitches – two on front bumper and one at the rear. Original circuitry of vehicle replaced with dual H-Bridge circuit to control drive motor and turn motor. Drive motor is controlled with variable speed. Power: Vehicle motors powered by 4 AA batteries. Arduino with XBee shield powered by 9V battery mounted at front of vehicle. Simple communications protocol: 2 byte commands from controller to vehicle, one byte sensor readings from vehicle to controller.

August 31st, 2011 at 06:35:36
Hi.. can you give the step by step process on how you did this.. i’m amaze on this project so i want to try to make this.. thanks..
August 31st, 2011 at 10:14:46
Hi Rhiegn.
You can find it here
http://nootropicdesign.com/projectlab/2010/03/04/wireless-robotics-platform/
best
davide
February 12th, 2012 at 12:13:23
hey your post is ausum…
i want to do the same but i thought of using ultrasonic sensor…for distance ranging…so can you help me with the codes…
i want to control the vehicle with my voice(vrbot)..will it work??
also i would like to ask weather it is necessary to have different xbee module…
i am really excited about this as this is my first project….really grateful for your further help on this..
thank you:))))))